This how to page is for v5 of the OzSpy recorder range.
Export/Backing Up Footage
The file management function supports backing up video and picture files with a USB device, such as a U disk and mobile hard disk.
First step is to insert a USB disk/storage device into the front USB port. If that port is taken by the mouse, move the mouse to the rear USB port and insert USB disk into front port.
To export/back up your recordings, please follow this process.

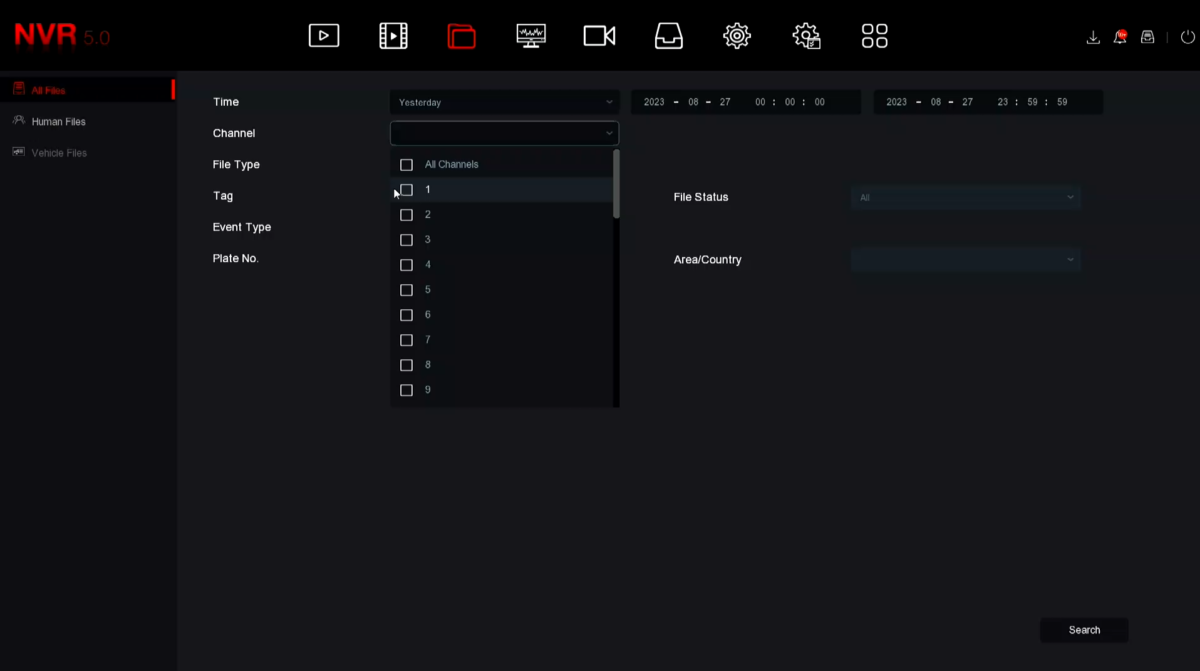
Click on the file management icon on the top row , then select date and channel and click Search (search button bottom right corner). Please note that you should only select one channel until you are comfortable doing this as the large list of files may be confusing as well as getting used to the length of time it takes.
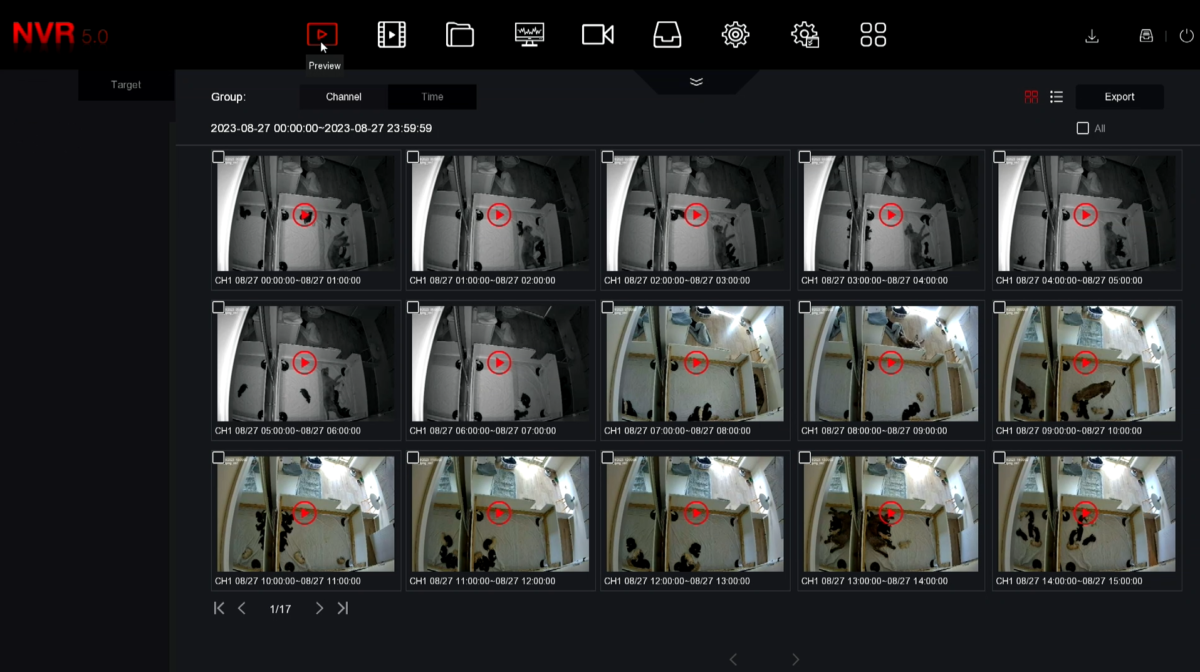
By selecting the icons near the Export button you can select Tile or List view.
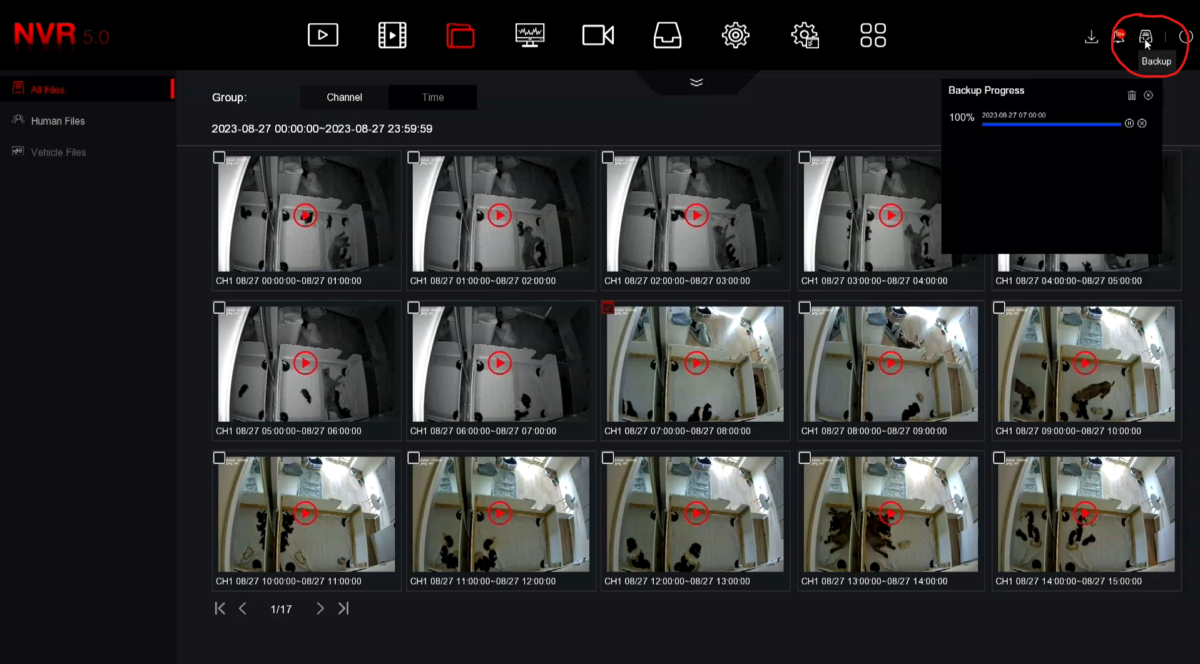
Tile View
List view
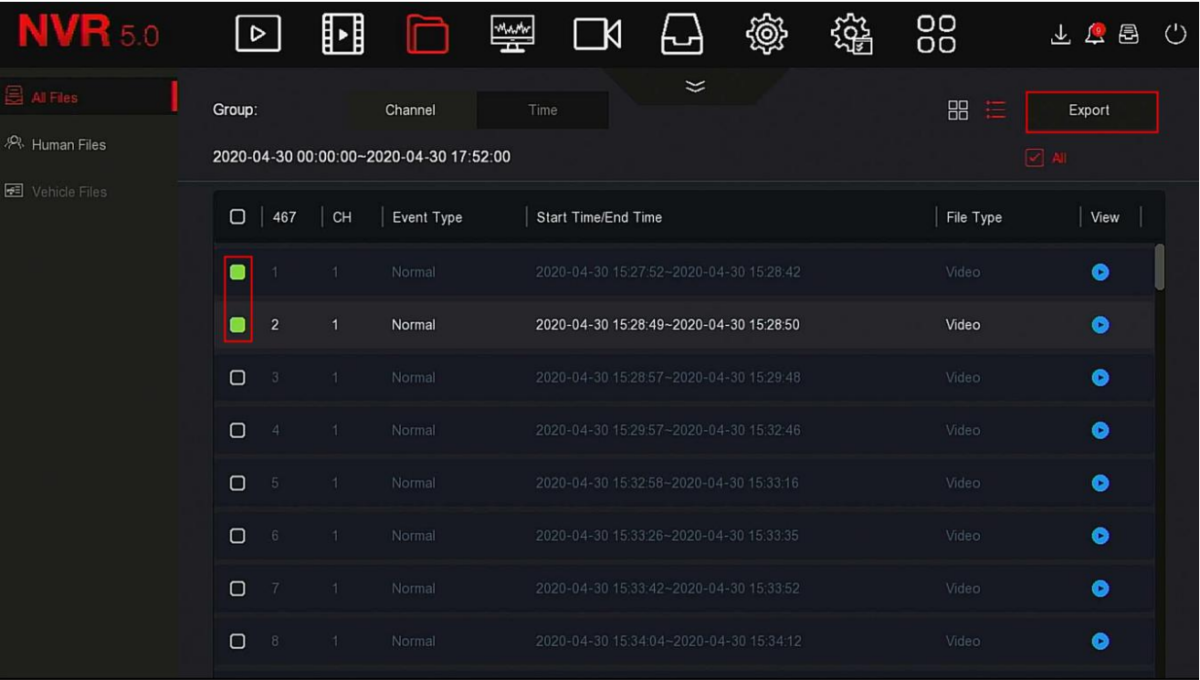
Once you have decided which file(s) to back up, simply select the file(s) and click Export on top righ of screen. Keep in mind that 4K video files are large and take some time, so we recommend one at a time.
You will then see some options of you wish to create a folder on the USB, otherwise select OK to start the export. Once OK is selected it may appear that it is not working, however it will be saving behind the scenes.
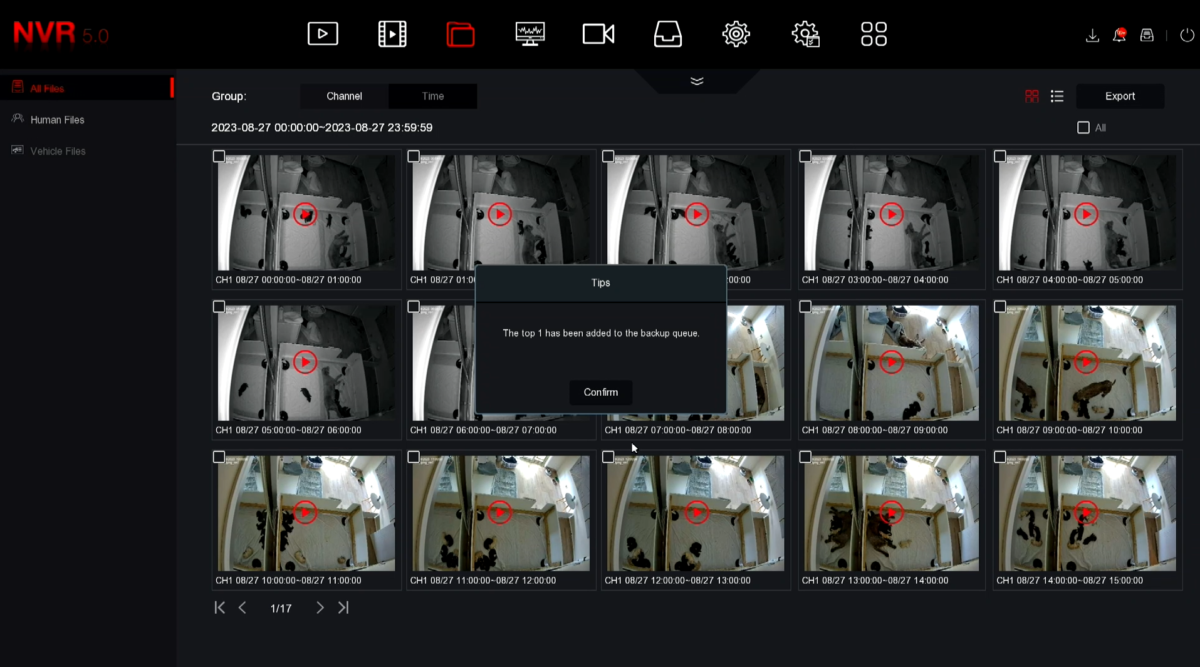
Now you will see a dialogue box with notification that the file(s) are added to the que.
To check the status of the files, select Backup progress button on very top 2nd from right hand side. Please do not remove USB stick untill 100%
Now you have your file which you can play with most PC media players, if you have difficulties, try using VLC Player.
